Barcodes are essential for inventory management, shipment tracking, and a variety of other applications. With the Aspose.BarCode for .NET, you can easily integrate the best C# WPF barcode generator capabilities for high-quality barcode generation in your C# barcode generation WPF application. This article explains how to create a robust C# WPF barcode generator that supports multiple symbologies and customization options, allowing you to generate barcodes in WPF using C# efficiently.
Key Topics:
- Features of WPF Barcode Generator
- C# Barcode Generator API
- Steps to Create a WPF Barcode Generator
- Generate Barcode with Additional Options
- Demo WPF Barcode Generator
- Download Source Code
Features of WPF Barcode Generator
The WPF Barcode Generator provides numerous features, including:
- Supported Barcode Types:
- 1D: Code128, Code11, Code39, EAN-13, EAN-8, ITF-14
- 2D: QR Code, Data Matrix, PDF417
- Image Export Options: Save barcodes in PNG, JPEG, and BMP formats.
- Preview Capability: Display generated barcode images before saving.
- Customization: Configure properties such as color, size, rotation, and captions for dynamic barcode generation WPF applications.
C# Barcode Generator API
Aspose.BarCode for .NET is a versatile and efficient barcode generation WPF C# library, enabling customizable barcode generation in WPF applications. It offers capabilities to adjust barcode properties such as resolution, dimensions, and color schemes, ensuring high-quality outputs suitable for diverse use cases.
Installation:
Install the API via NuGet:
PM> Install-Package Aspose.BarCode
Alternatively, download the DLL for manual integration.
Steps to Create WPF Barcode Generator
Step 1: Create a New WPF Project
- Open Visual Studio and select WPF Application as the project template.
- Name your project (e.g.,
BarcodeGen) and choose the desired .NET framework.
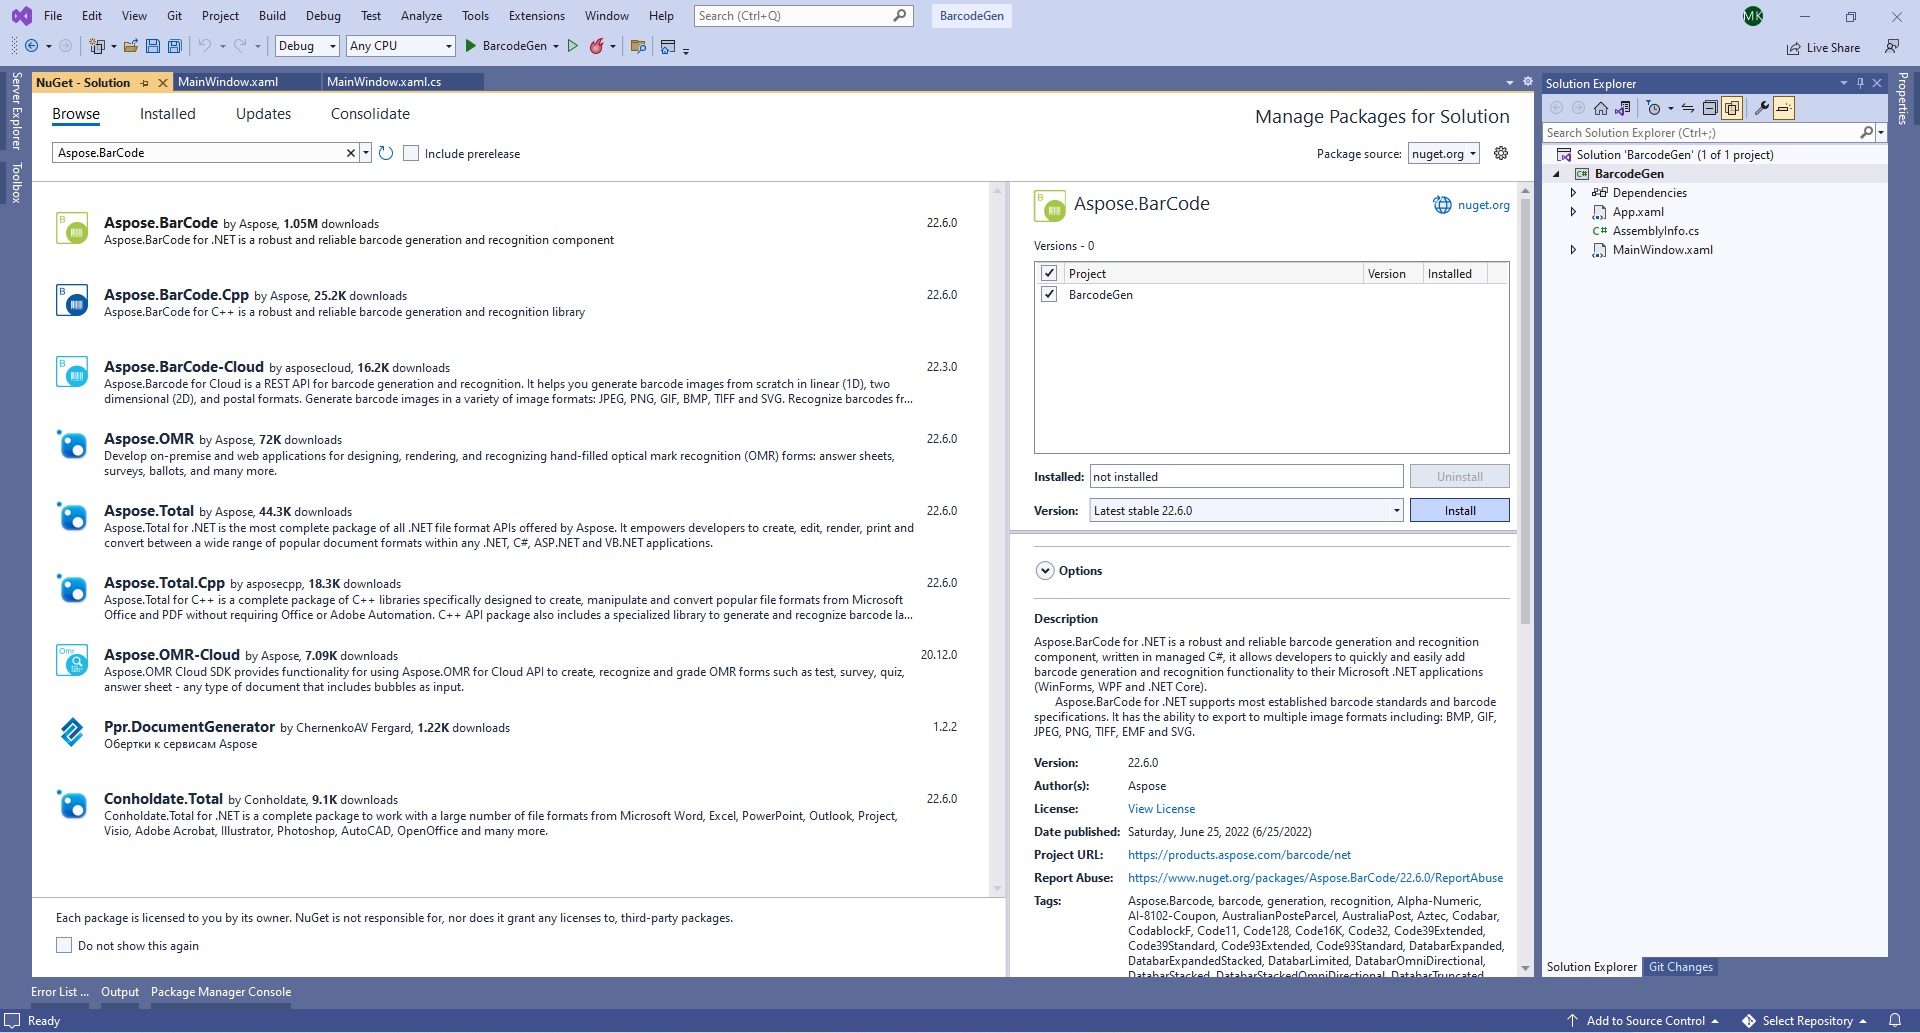
Step 2: Install Aspose.BarCode for .NET
Use NuGet Package Manager to install the Aspose.BarCode package, enabling easy C# WPF barcode integration.

Install Aspose.BarCode for .NET
Step 3: Define the Barcode Logic
Add a new class file (Barcode.cs) to handle the barcode generation logic, making your C# WPF barcode generator for .NET Core efficient.
Step 4: Design the Main Window
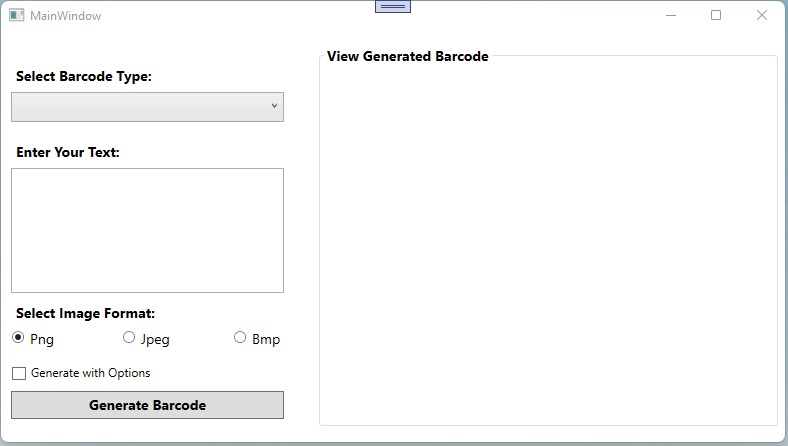
Customize the UI in MainWindow.xaml to include controls for generating and previewing barcodes, utilizing a WPF barcode control C#.

Add the required controls
Replace the default content in MainWindow.xaml with the following:
Step 5: Handle Button Click Events
Implement the btnGenerate_Click event in MainWindow.xaml.cs to trigger the barcode generation process.
Step 6: Implement Barcode Generation Logic
Write a function to generate and display barcodes, enhancing the app’s usability and efficiency for barcode generation WPF C#.
Step 7: Run the Application
Build and run the project to test your WPF Barcode Generator, ensuring easy integration and functionality.
Generate Barcode with Additional Options
Enhance barcode generation by including advanced options such as custom dimensions, rotation, and symbology-specific parameters. This will facilitate high-performance barcode generation WPF C#.
Read more about Generation Specifics for Barcode Types.
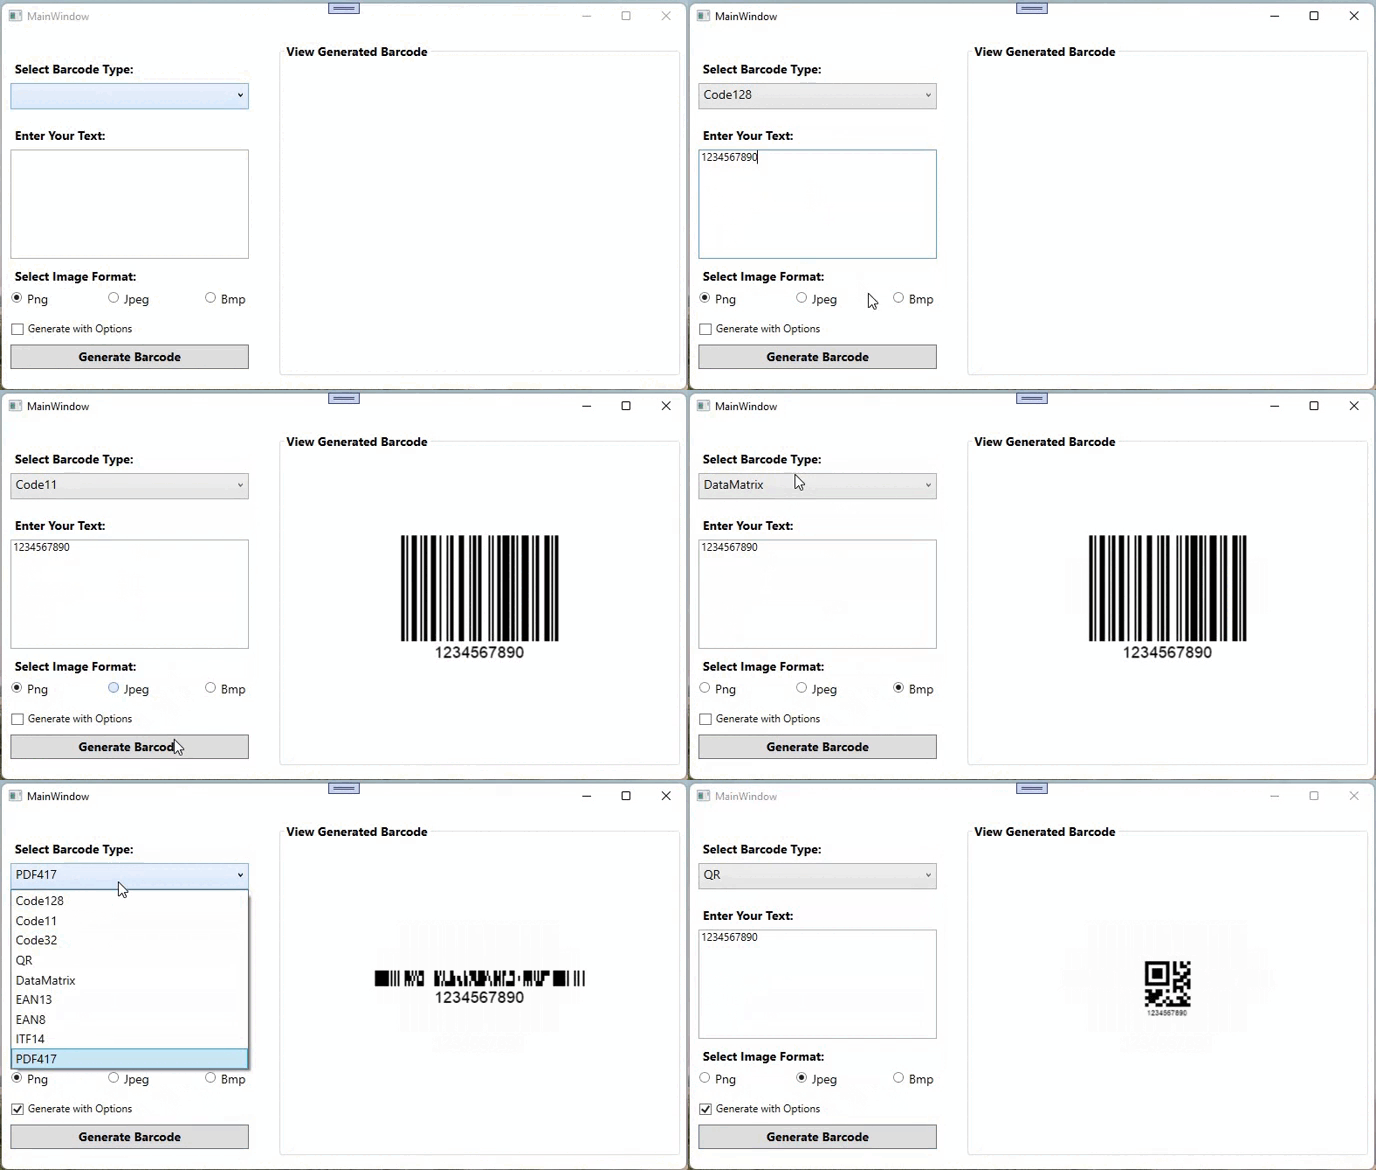
Demo WPF Barcode Generator
Below is a demonstration of the WPF Barcode Generator application:

Demo WPF Barcode Generator
Download Source Code
Get the complete source code for the WPF Barcode Generator from GitHub, including examples of customizable barcode generation WPF C#.
Get a Free License
Test the API without evaluation limitations by obtaining a free temporary license.
Conclusion
This guide has demonstrated how to create a WPF Barcode Generator using Aspose.BarCode for .NET. From generating barcode images to adding advanced customization, you now have a solid foundation for integrating high-quality barcode generation in WPF applications. For further details, explore the documentation or reach out via our support forum.